参考:Building a WebGL Carousel with React Three Fiber and GSAP
在线 demogithub 源码效果来源于由 Eum Ray 创建的网站 alcre.co.kr,具有迷人的视觉效果和交互性,具有可拖动或滚动的轮播,具有有趣的图像展示效果。
本文将使用 WebGL、React Three Fiber 和 GSAP 实现类似的效果。通过本文,可以了解如何使用 WebGL、React Three Fiber 和 GSAP 创建交互式 3D 轮播。
 (资料图片仅供参考)
首先,用 createreact app创建项目
npx create-react-app webgl-carsouelcd webgl-carsouelnpm start然后安装相关依赖
npm i @react-three/fiber @react-three/drei gsap leva react-use -S首先,创建一个任意大小的平面,放置于原点(0, 0, 0)并面向相机。然后,使用 shaderMaterial材质将所需图像插入到材质中,修改 UV 位置,让图像填充整个几何体表面。
为了实现这一点,需要使用一个 glsl 函数,函数将平面和图像的比例作为转换参数:
/* --------------------------------Background Cover UV--------------------------------u = basic UVs = plane sizei = image size*/vec2 CoverUV(vec2 u, vec2 s, vec2 i) { float rs = s.x / s.y; // aspect plane size float ri = i.x / i.y; // aspect image size vec2 st = rs < ri ? vec2(i.x * s.y / i.y, s.y) : vec2(s.x, i.y * s.x / i.x); // new st vec2 o = (rs < ri ? vec2((st.x - s.x) / 2.0, 0.0) : vec2(0.0, (st.y - s.y) / 2.0)) / st; // offset return u * s / st + o;}接下来,将定义2个 uniforms:uRes和 uImageRes。每当改变视口大小时,这2个变量将会随之改变。使用 uRes以像素为单位存储片面的大小,使用 uImageRes存储图像纹理的大小。
下面是创建平面和设置着色器材质的代码:
// Plane.jsimport { useEffect, useMemo, useRef } from "react"import { useThree } from "@react-three/fiber"import { useTexture } from "@react-three/drei"import { useControls } from "leva"const Plane = () => { const $mesh = useRef() const { viewport } = useThree() const tex = useTexture( "https://raw.githubusercontent.com/supahfunk/webgl-carousel/main/public/img/1.jpg" ) const { width, height } = useControls({ width: { value: 2, min: 0.5, max: viewport.width, }, height: { value: 3, min: 0.5, max: viewport.height, } }) useEffect(() => { if ($mesh.current.material) { $mesh.current.material.uniforms.uRes.value.x = width $mesh.current.material.uniforms.uRes.value.y = height } }, [viewport, width, height]) const shaderArgs = useMemo(() => ({ uniforms: { uTex: { value: tex }, uRes: { value: { x: 1, y: 1 } }, uImageRes: { value: { x: tex.source.data.width, y: tex.source.data.height } } }, vertexShader: /* glsl */ ` varying vec2 vUv; void main() { vUv = uv; vec3 pos = position; gl_Position = projectionMatrix * modelViewMatrix * vec4( pos, 1.0 ); } `, fragmentShader: /* glsl */ ` uniform sampler2D uTex; uniform vec2 uRes; uniform vec2 uImageRes; /* ------------------------------------- background Cover UV ------------------------------------- u = basic UV s = screen size i = image size */ vec2 CoverUV(vec2 u, vec2 s, vec2 i) { float rs = s.x / s.y; // aspect screen size float ri = i.x / i.y; // aspect image size vec2 st = rs < ri ? vec2(i.x * s.y / i.y, s.y) : vec2(s.x, i.y * s.x / i.x); // new st vec2 o = (rs < ri ? vec2((st.x - s.x) / 2.0, 0.0) : vec2(0.0, (st.y - s.y) / 2.0)) / st; // offset return u * s / st + o; } varying vec2 vUv; void main() { vec2 uv = CoverUV(vUv, uRes, uImageRes); vec3 tex = texture2D(uTex, uv).rgb; gl_FragColor = vec4(tex, 1.0); } ` }), [tex]) return ( )}export default Plane首先, 设置一个新组件来包裹
使用着色器材质 shaderMaterial调整 mesh大小可保持几何空间的尺寸。因此,激活缩放效果后,必须显示一个新的透明平面,其尺寸与视口相当,方便点击整个图像恢复到初始状态。
此外,还需要在平面的着色器中实现波浪效果。
因此,在 uniforms中添加一个新字段 uZoomScale,存储缩放平面的值 x、y,从而得到顶点着色器的位置。缩放值通过在平面尺寸和视口尺寸比例来计算:
$mesh.current.material.uniforms.uZoomScale.value.x = viewport.width / width$mesh.current.material.uniforms.uZoomScale.value.y = viewport.height / height接下来,在 uniforms中添加一个新字段 uProgress,来控制波浪效果的数量。通过使用 GSAP 修改 uProgress,动画实现平滑的缓动效果。
创建波形效果,可以在顶点着色器中使用 sin函数,函数在平面的 x 和 y 位置上添加波状运动。
// CarouselItem.jsimport { useEffect, useRef, useState } from "react"import { useThree } from "@react-three/fiber"import gsap from "gsap"import Plane from "./Plane"const CarouselItem = () => { const $root = useRef() const [hover, setHover] = useState(false) const [isActive, setIsActive] = useState(false) const { viewport } = useThree() useEffect(() => { gsap.killTweensOf($root.current.position) gsap.to($root.current.position, { z: isActive ? 0 : -0.01, duration: 0.2, ease: "power3.out", delay: isActive ? 0 : 2 }) }, [isActive]) // hover effect useEffect(() => { const hoverScale = hover && !isActive ? 1.1 : 1 gsap.to($root.current.scale, { x: hoverScale, y: hoverScale, duration: 0.5, ease: "power3.out" }) }, [hover, isActive]) const handleClose = (e) => { e.stopPropagation() if (!isActive) return setIsActive(false) } const textureUrl = "https://raw.githubusercontent.com/supahfunk/webgl-carousel/main/public/img/1.jpg" return ( setIsActive(true)} onPointerEnter={() => setHover(true)} onPointerLeave={() => setHover(false)} > ) : null} )}export default CarouselItem
// Plane.jsimport { useEffect, useMemo, useRef } from "react"import { useThree } from "@react-three/fiber"import { useTexture } from "@react-three/drei"import gsap from "gsap"const Plane = ({ texture, width, height, active, ...props}) => { const $mesh = useRef() const { viewport } = useThree() const tex = useTexture(texture) useEffect(() => { if ($mesh.current.material) { // setting $mesh.current.material.uniforms.uZoomScale.value.x = viewport.width / width $mesh.current.material.uniforms.uZoomScale.value.y = viewport.height / height gsap.to($mesh.current.material.uniforms.uProgress, { value: active ? 1 : 0, duration: 2.5, ease: "power3.out" }) gsap.to($mesh.current.material.uniforms.uRes.value, { x: active ? viewport.width : width, y: active? viewport.height : height, duration: 2.5, ease: "power3.out" }) } }, [viewport, active]); const shaderArgs = useMemo(() => ({ uniforms: { uProgress: { value: 0 }, uZoomScale: { value: { x: 1, y: 1 } }, uTex: { value: tex }, uRes: { value: { x: 1, y: 1 } }, uImageRes: { value: { x: tex.source.data.width, y: tex.source.data.height } } }, vertexShader: /* glsl */ ` varying vec2 vUv; uniform float uProgress; uniform vec2 uZoomScale; void main() { vUv = uv; vec3 pos = position; float angle = uProgress * 3.14159265 / 2.; float wave = cos(angle); float c = sin(length(uv - .5) * 15. + uProgress * 12.) * .5 + .5; pos.x *= mix(1., uZoomScale.x + wave * c, uProgress); pos.y *= mix(1., uZoomScale.y + wave * c, uProgress); gl_Position = projectionMatrix * modelViewMatrix * vec4( pos, 1.0 ); } `, fragmentShader: /* glsl */ ` uniform sampler2D uTex; uniform vec2 uRes; // uniform vec2 uZoomScale; uniform vec2 uImageRes; /* ------------------------------------- background Cover UV ------------------------------------- u = basic UV s = screen size i = image size */ vec2 CoverUV(vec2 u, vec2 s, vec2 i) { float rs = s.x / s.y; // aspect screen size float ri = i.x / i.y; // aspect image size vec2 st = rs < ri ? vec2(i.x * s.y / i.y, s.y) : vec2(s.x, i.y * s.x / i.x); // new st vec2 o = (rs < ri ? vec2((st.x - s.x) / 2.0, 0.0) : vec2(0.0, (st.y - s.y) / 2.0)) / st; // offset return u * s / st + o; } varying vec2 vUv; void main() { vec2 uv = CoverUV(vUv, uRes, uImageRes); vec3 tex = texture2D(uTex, uv).rgb; gl_FragColor = vec4(tex, 1.0); } ` }), [tex]) return ( )}export default Plane这部分是最有趣的,但也是最复杂的,因为必须考虑很多事情。
首先,需要使用 renderSlider创建一个组用以包含所有图像,图像用 renderPlaneEvent()创建一个片面用以管理事件。
轮播最重要的部分在 useFrame()中,需要计算滑块进度,使用 displayItems()函数设置所有item位置。
另一个需要考虑的重要方面是 z位置,当它变为活动状态时,需要使其 z位置更靠近相机,以便缩放效果不会与其他 meshs冲突。这也是为什么当退出缩放时,需要 mesh足够小以将 z轴位置恢复为 0 (详见 meshs的点击,直到缩放效果被停用。
// data/images.jsconst images = [ { image: "https://raw.githubusercontent.com/supahfunk/webgl-carousel/main/public/img/1.jpg" }, { image: "https://raw.githubusercontent.com/supahfunk/webgl-carousel/main/public/img/2.jpg" }, { image: "https://raw.githubusercontent.com/supahfunk/webgl-carousel/main/public/img/3.jpg" }, { image: "https://raw.githubusercontent.com/supahfunk/webgl-carousel/main/public/img/4.jpg" }, { image: "https://raw.githubusercontent.com/supahfunk/webgl-carousel/main/public/img/5.jpg" }, { image: "https://raw.githubusercontent.com/supahfunk/webgl-carousel/main/public/img/6.jpg" }, { image: "https://raw.githubusercontent.com/supahfunk/webgl-carousel/main/public/img/7.jpg" }, { image: "https://raw.githubusercontent.com/supahfunk/webgl-carousel/main/public/img/8.jpg" }, { image: "https://raw.githubusercontent.com/supahfunk/webgl-carousel/main/public/img/9.jpg" }, { image: "https://raw.githubusercontent.com/supahfunk/webgl-carousel/main/public/img/10.jpg" }, { image: "https://raw.githubusercontent.com/supahfunk/webgl-carousel/main/public/img/11.jpg" }, { image: "https://raw.githubusercontent.com/supahfunk/webgl-carousel/main/public/img/12.jpg" }]export default images// Carousel.jsimport { useEffect, useRef, useState, useMemo } from "react";import { useFrame, useThree } from "@react-three/fiber";import { usePrevious } from "react-use"import gsap from "gsap"import CarouselItem from "./CarouselItem"import images from "../data/images"// Plane settingsconst planeSettings = { width: 1, height: 2.5, gap: 0.1}// gsap defaultsgsap.defaults({ duration: 2.5, ease: "power3.out"})const Carousel = () => { const [$root, setRoot] = useState(); const [activePlane, setActivePlane] = useState(null); const prevActivePlane = usePrevious(activePlane) const { viewport } = useThree() // vars const progress = useRef(0) const startX = useRef(0) const isDown = useRef(false) const speedWheel = 0.02 const speedDrag = -0.3 const $items = useMemo(() => { if ($root) return $root.children }, [$root]) const displayItems = (item, index, active) => { gsap.to(item.position, { x: (index - active) * (planeSettings.width + planeSettings.gap), y: 0 }) } useFrame(() => { progress.current = Math.max(0, Math.min(progress.current, 100)) const active = Math.floor((progress.current / 100) * ($items.length - 1)) $items.forEach((item, index) => displayItems(item, index, active)) }) const handleWheel = (e) => { if (activePlane !== null) return const isVerticalScroll = Math.abs(e.deltaY) > Math.abs(e.deltaX) const wheelProgress = isVerticalScroll ? e.deltaY : e.deltaX progress.current = progress.current + wheelProgress * speedWheel } const handleDown = (e) => { if (activePlane !== null) return isDown.current = true startX.current = e.clientX || (e.touches && e.touches[0].clientX) || 0 } const handleUp = () => { isDown.current = false } const handleMove = (e) => { if (activePlane !== null || !isDown.current) return const x = e.clientX || (e.touches && e.touches[0].clientX) || 0 const mouseProgress = (x - startX.current) * speedDrag progress.current = progress.current + mouseProgress startX.current = x } // click useEffect(() => { if (!$items) return if (activePlane !== null && prevActivePlane === null) { progress.current = (activePlane / ($items.length - 1)) * 100 } }, [activePlane, $items]); const renderPlaneEvents = () => { return ( ) } const renderSlider = () => { return ( {images.map((item, i) => ( ) } return ( {renderPlaneEvents()} {renderSlider()} )}export default Carousel
// CarouselItem.jsimport { useEffect, useRef, useState } from "react"import { useThree } from "@react-three/fiber"import gsap from "gsap"import Plane from "./Plane"const CarouselItem = ({ index, width, height, setActivePlane, activePlane, item}) => { const $root = useRef() const [hover, setHover] = useState(false) const [isActive, setIsActive] = useState(false) const [isCloseActive, setIsCloseActive] = useState(false); const { viewport } = useThree() const timeoutID = useRef() useEffect(() => { if (activePlane === index) { setIsActive(activePlane === index) setIsCloseActive(true) } else { setIsActive(null) } }, [activePlane]); useEffect(() => { gsap.killTweensOf($root.current.position) gsap.to($root.current.position, { z: isActive ? 0 : -0.01, duration: 0.2, ease: "power3.out", delay: isActive ? 0 : 2 }) }, [isActive]) // hover effect useEffect(() => { const hoverScale = hover && !isActive ? 1.1 : 1 gsap.to($root.current.scale, { x: hoverScale, y: hoverScale, duration: 0.5, ease: "power3.out" }) }, [hover, isActive]) const handleClose = (e) => { e.stopPropagation() if (!isActive) return setActivePlane(null) setHover(false) clearTimeout(timeoutID.current) timeoutID.current = setTimeout(() => { setIsCloseActive(false) }, 1500); // 这个计时器的持续时间取决于 plane 关闭动画的时间 } return ( setActivePlane(index)} onPointerEnter={() => setHover(true)} onPointerLeave={() => setHover(false)} > ) : null} )}export default CarouselItem真正吸引我眼球并激发我复制次轮播的是视口边缘拉伸像素的效果。
过去,我通过 @react-three/postprocessing 来自定义着色器多次实现此效果。然而,最近我一直在使用 MeshTransmissionMaterial,因此有了一个想法,尝试用这种材料覆盖 mesh并调整设置实现效果。效果几乎相同!
诀窍是将 material的 thickness属性与轮播滚动进度的速度联系起来,仅此而已。
// PostProcessing.jsimport { forwardRef } from "react";import { useThree } from "@react-three/fiber";import { MeshTransmissionMaterial } from "@react-three/drei";import { Color } from "three";import { useControls } from "leva"const PostProcessing = forwardRef((_, ref) => { const { viewport } = useThree() const { active, ior } = useControls({ active: { value: true }, ior: { value: 0.9, min: 0.8, max: 1.2 } }) return active ? ( ) : null})export default PostProcessing因为后处理作用于
// Carousel.jsimport { useEffect, useRef, useState, useMemo } from "react";import { useFrame, useThree } from "@react-three/fiber";import { usePrevious } from "react-use"import gsap from "gsap"import PostProcessing from "./PostProcessing";import CarouselItem from "./CarouselItem"import { lerp, getPiramidalIndex } from "../utils";import images from "../data/images"// Plane settingsconst planeSettings = { width: 1, height: 2.5, gap: 0.1}// gsap defaultsgsap.defaults({ duration: 2.5, ease: "power3.out"})const Carousel = () => { const [$root, setRoot] = useState(); const $post = useRef() const [activePlane, setActivePlane] = useState(null); const prevActivePlane = usePrevious(activePlane) const { viewport } = useThree() // vars const progress = useRef(0) const startX = useRef(0) const isDown = useRef(false) const speedWheel = 0.02 const speedDrag = -0.3 const oldProgress = useRef(0) const speed = useRef(0) const $items = useMemo(() => { if ($root) return $root.children }, [$root]) const displayItems = (item, index, active) => { const piramidalIndex = getPiramidalIndex($items, active)[index] gsap.to(item.position, { x: (index - active) * (planeSettings.width + planeSettings.gap), y: $items.length * -0.1 + piramidalIndex * 0.1 }) } useFrame(() => { progress.current = Math.max(0, Math.min(progress.current, 100)) const active = Math.floor((progress.current / 100) * ($items.length - 1)) $items.forEach((item, index) => displayItems(item, index, active)) speed.current = lerp(speed.current, Math.abs(oldProgress.current - progress.current), 0.1) oldProgress.current = lerp(oldProgress.current, progress.current, 0.1) if ($post.current) { $post.current.thickness = speed.current } }) const handleWheel = (e) => { if (activePlane !== null) return const isVerticalScroll = Math.abs(e.deltaY) > Math.abs(e.deltaX) const wheelProgress = isVerticalScroll ? e.deltaY : e.deltaX progress.current = progress.current + wheelProgress * speedWheel } const handleDown = (e) => { if (activePlane !== null) return isDown.current = true startX.current = e.clientX || (e.touches && e.touches[0].clientX) || 0 } const handleUp = () => { isDown.current = false } const handleMove = (e) => { if (activePlane !== null || !isDown.current) return const x = e.clientX || (e.touches && e.touches[0].clientX) || 0 const mouseProgress = (x - startX.current) * speedDrag progress.current = progress.current + mouseProgress startX.current = x } // click useEffect(() => { if (!$items) return if (activePlane !== null && prevActivePlane === null) { progress.current = (activePlane / ($items.length - 1)) * 100 } }, [activePlane, $items]); const renderPlaneEvents = () => { return ( ) } const renderSlider = () => { return ( {images.map((item, i) => ( ) } return ( {renderPlaneEvents()} {renderSlider()} )}export default Carousel// utils/index.js/** * 返回 v0, v1 之间的一个值,可以根据 t 进行计算 * 示例: * lerp(5, 10, 0) // 5 * lerp(5, 10, 1) // 10 * lerp(5, 10, 0.2) // 6 */export const lerp = (v0, v1, t) => v0 * (1 - t) + v1 * t/** * 以金字塔形状返回索引值递减的数组,从具有最大值的指定索引开始。这些索引通常用于在元素之间创建重叠效果 * 示例:array = [0, 1, 2, 3, 4, 5] * getPiramidalIndex(array, 0) // [ 6, 5, 4, 3, 2, 1 ] * getPiramidalIndex(array, 1) // [ 5, 6, 5, 4, 3, 2 ] * getPiramidalIndex(array, 2) // [ 4, 5, 6, 5, 4, 3 ] * getPiramidalIndex(array, 3) // [ 3, 4, 5, 6, 5, 4 ] * getPiramidalIndex(array, 4) // [ 2, 3, 4, 5, 6, 5 ] * getPiramidalIndex(array, 5) // [ 1, 2, 3, 4, 5, 6 ] */export const getPiramidalIndex = (array, index) => { return array.map((_, i) => index === i ? array.length : array.length - Math.abs(index - i))}总之,通过使用 React Three Fiber 、GSAP 和一些创造力,可以在 WebGL 中创建令人惊叹的视觉效果和交互式组件,就像受 alcre.co.kr 启发的轮播一样。希望这篇文章对您自己的项目有所帮助和启发!
下一篇:最后一页
- 准新郎酒驾被查 没想到这已经是第四次了
- @千万郑州人,今后非机动车违法采取新办法,需现场朗读“承诺书”
- 4月河南物价水平保持温和上涨
- 被车评人集体声讨的保时捷终于妥协:免费恢复功能,延保一年
- 郑州市经开区率先部署15分钟核酸检测“采样圈” 记者实探经北一路核酸采样工作站
- 最新全国疫情中高风险地区名单:全国现有高中风险地区15+64个(统计时间:5月19日6时)
- 北京疫情最新消息|5月18日北京新增50例本土确诊病例和5例无症状感染者
- 上海疫情最新消息|5月18日上海新增本土确诊病例82例和本土无症状感染者637例
- 郑州限号|今天是2022年5月19日,郑州限行尾号是4和9
- 发码总数超68万!郑州市“场所码”覆盖精度再提升
-
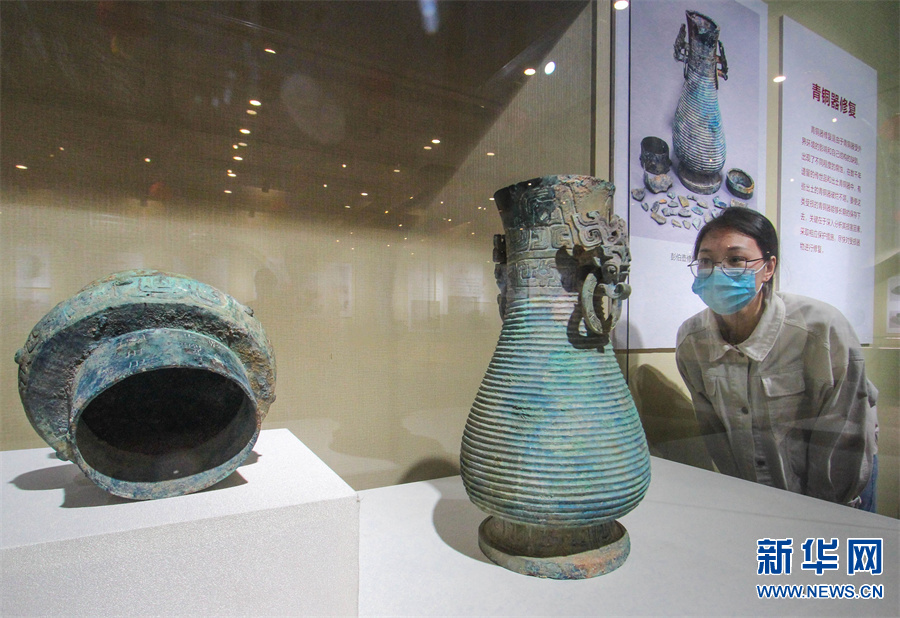
国际博物馆日 河南省南阳市多家博物馆开展线上线下活动
5月17日,河南省南阳市博物馆,游客在观看春秋时期的青铜壶。5月18日是国际博物馆日,河南省南阳市多家博物馆开展线上线下活动,让游客感受
-
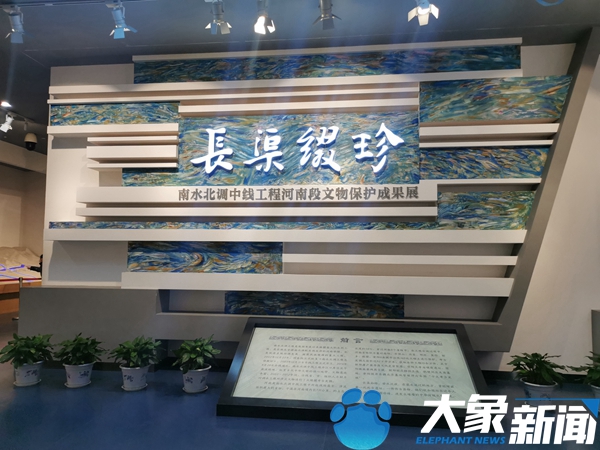
南水北调河南段如何成为贯通古今的文脉?
一条渠,绵延千里北上,滋润人间心田。2014年12月12日,南水北调中线工程正式通水。从此,甘甜可口的长江水奔腾不息地流经1432公里,流进千
-

奋战39天 河南省援沪核酸检测医疗队凯旋
5月14日下午,在上海疫情防控一线奋战39天,总计圆满完成130万管核酸检测任务的河南省援沪核酸检测医疗队队员乘坐飞机回到郑州,受到来自省
-

全国首批15个“天气气候景观观赏地”公布 老君山云海入围!
近日,中国气象服务协会公布了我国首批15个天气气候景观观赏地,江西庐山云海景观、安徽歙县坡山村云海景观、福建霞浦县三沙日出日落景观等
-
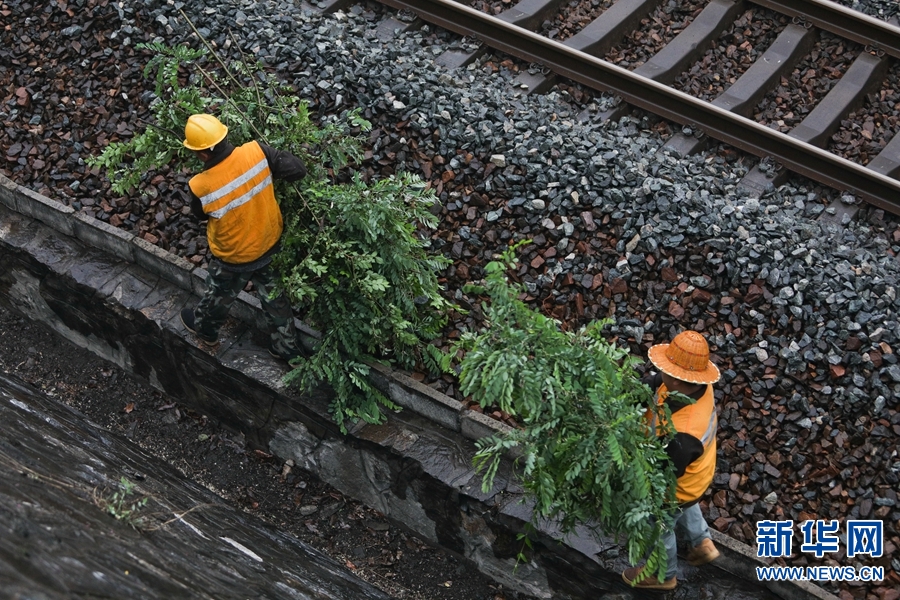
中国铁路郑州局集团有限公司南阳工务段:深山除危树 奋力护路忙
5月9日,宁西线豫陕交界处,中国铁路郑州局集团有限公司南阳工务段护路员工对线路两边山体的危树进行清理整治。立夏时节,秦岭山脉云雾缭绕
X 关闭
X 关闭